
Since Windows 8.1, Windows provides the option to create a virtual hard drives (VHDs) from the Disk Manager. This basically means you’re able to create a file that can be mounted on your computer just like any old drive. Its intended purpose is to be used in virtual applications (such as Hyper-V), but since you can mount those drives on your Windows PC like normal, you can easily use them as a “flash drive” of-sorts that is always on your computer.
I leveraged that ability to store many of my files in VHDs. Right now, most of my development work is in a VHD, since I can easily back up by just copying a single file across multiple hard drives (which means I can simply do away with using Macrium Reflect or dd or some other copying tool). It’s been a lifesaver for many things: namely, I was able to immediately start working after my laptop broke down because I had a VHD copy, and I no longer had to extract those files from a ZIP file, download them from online, nor did I need to use an entire drive for saving things.
Around 2018, I remembered BitLocker exists for Windows 10 Pro. To summarize BitLocker, it uses the computer’s Trusted Platform Module (TPM) or a startup key saved on a flash drive (if your computer doesn’t have a TPM) to encrypt entire drives. To open a BitLocker-encrypted drive, you’ll need to enter a password.
Given that you can create virtual drives, and that you can encrypt drives, I’ve been storing some rather important secrets in a BitLocker-encrypted VHD for a while now. Such a system doesn’t need anything more than just Windows, and you have the option of creating such a setup as soon as Windows is installed.
Quick disclaimer: This only works for Windows 10 Pro and above. Windows 10/11 Home does not provide BitLocker. Also, I made this tutorial for a friend, and is primarily intended for those who are not tech-savvy but still want to keep their files secure with whatever they have now.
So, how do we get started?
1. Create a virtual hard disk
First, open Disk Management. There’s many ways to do this, and it’s up to you on what you want to do.
- Press your Windows Key + R to open the Run dialog, enter “
diskmgmt.msc” and press “OK”. - Search for “Disk Management” on Windows search.
- Open your start menu, look for “Disk Management” (commonly in the “Windows Administration Tools” folder), and open it.
- Open your Control Panel, find “Windows Tools” when viewing by large icons, open “Computer Management”, and select the “Disk Management” option on the left side (under “Storage”).
Whichever method you follow, you should now see the Disk Management panel.

On the toolbar, click on “Action”, and “Create VHD”. What should appear is a dialog that looks like this.

Specify a location by clicking the “Browse” button, or type the location in yourself. For the size: this is up to you. For my encrypted drive, I went went a decent 16 GB, which is enough to fit a large amount of documents, images, and videos. You can even go as low as 512 MB if you’re not storing much anyway.
For the format, select VHDX unless you’re not insane. This should automatically select the virtual hard disk type: dynamically expanding. If you want the drive to take up all the space it will ever need, set it to fixed size (note that you will have a file almost as big as the size you entered earlier, as expected).
Once you’ve pressed “OK”, your disk should appear at the bottom of the lower panel. It will have a red arrow pointing down, and text saying “Not Initialized”. To be able to use this drive, you’ll need to initialize it first, by right-clicking the drive and clicking on “Initialize Disk”.

You’ll be asked which partition style you want to use, either Master Boot Record (MBR) or GUID Partition Table (GPT). Since BitLocker only works for Windows 10 and above anyway, you can get away with just using GPT here.

After this, you can now create the partition responsible for holding all your files. This is the last step in creating the VHD. Right click on the “Unallocated” block, and select “New Simple Volume…”

You’ll see a wizard pop up, which will guide you through creating a partition.
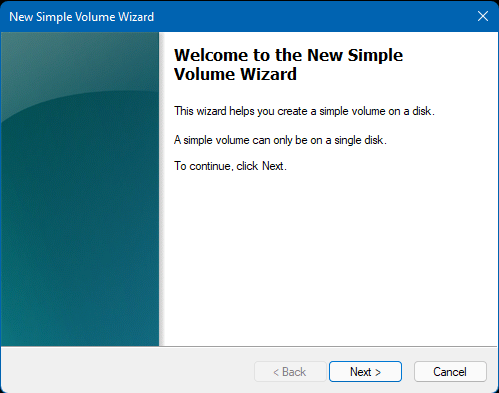
You can just rapidly click on your “Next” button here, since none of the options are that important. However, you can chose to configure the drive letter (or path) that the partition will mount to, and the name of the partition to create. Stick to NTFS, here, since only Windows 10 and above supports BitLocker anyway. No need to experience the pain of using a FAT32 partition for no reason. Once you’re done with that, click on the “Finish” button and you should find your virtual drive on your list of drives in Windows Explorer.

Congratulations! You now have a virtual drive. Now let’s encrypt it with BitLocker.
2. Encrypt the drive with BitLocker
Head into your Control Panel, set the view to “Large Icons”, and look for “BitLocker Drive Encryption”.

From there, you should be able to see the drive you just made, with a “Turn on BitLocker” link when opening the dropdown.

Select on “use a password to unlock the drive” and type in the password you want to use. You can also use a smart card (if you have one).

You’ll be asked to save your recovery key somewhere. This is used in case you ever forget your password or if you lose your smart card.

You can also choose to save it to your Microsoft account, in case you’ve logged into Windows with one. Note that this step is required and will prevent you from proceeding if you didn’t save it anywhere.
You then have the option of selecting how much of the drive you want encrypted. Since we just made the drive a few minutes ago, you can just encrypt the entire drive without fuss.

You then have another question on encryption mode if you’re on Windows 10 version 1511 and above. Since this drive is staying on your PC, just stick with the new encryption mode.

Once you press next, you’ll be asked if you’re ready to start encrypting. Click on “Start encrypting” whenever you’re ready. This usually won’t even take a few seconds since the drive is practically empty. After that, congrats! Your drive is now encrypted with BitLocker. You can prove this by opening the “BitLocker Drive Encryption” page on the Control Panel earlier, and see settings related to the drive’s BitLocker (including an option to turn it off).

This drive will automatically lock itself whenever it is unmounted. Unmounting the drive is as easy as right clicking it in the Windows Explorer and clicking “Eject”.
Final notes
If you want to remount the drive, just double click on the VHDX file you created earlier.
Whenever you’re remounting the drive after ejecting it, you might get an “Access is denied” message. This is expected, since you’ll need to enter your password first before accessing the drive. To unlock it, click on the notification from BitLocker Drive Encryption that appears when the drive is remounted.


After that, your encrypted drive should just open normally. Don’t forget to eject it when you’re done using it! Or else you would defeat the purpose of having an encrypted drive.
If you want to back up the drive, just copy the VHDX file somewhere else. It will retain its encryption no matter how many times you move/copy the file, as long as you don’t damage it.
How secure is BitLocker and should you trust it for storing important data? Look no further than the programmer’s best friend, Stack Exchange, for an answer.
In general, Bitlocker is secure and is used by companies all over the world. You can’t just extract keys out of the TPM hardware. Evil maid attacks are mitigated also since TPM will validate the pre-boot components to make sure that nothing has been tampered with. Booting into another OS like Linux to extract passwords or the data will not be possible also, since the TPM will not release its keys if it sees you’re booting into another OS (even if it is another Windows OS).
from “Is Windows BitLocker secure?“, CC BY-SA 3.0
Then again, I could be entirely missing the mark and the use of BitLocker. But who cares? At least I don’t have to pay for some freemium folder locking program.